


")


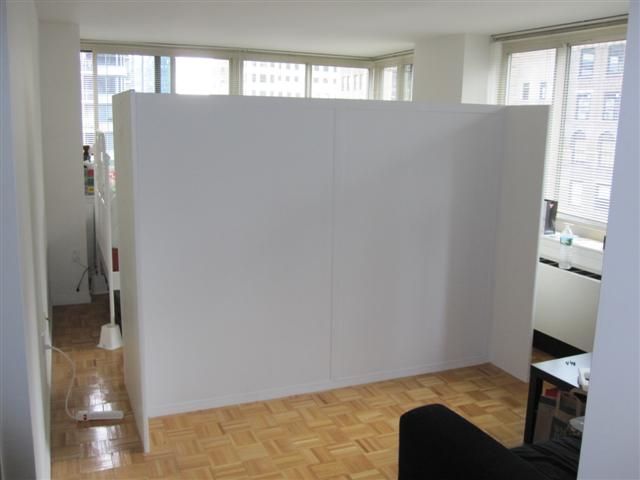
Is the layout of your space is not convenient for you? And looking for how to build a temporary wall partition? Then exactly a temporary wall partition is a right option for you. Temporary walls help you to partition your home or room into subdivisions.
Nowadays, more and more people utilize this room divider for various purposes in the home, office, restaurant, and other places. Due to the modern world, Childs and adults are as well as require a separate room for their privacy and to store things neatly.
In order to partition a certain area into the division, you can’t able to make a permanent wall by altering the entire home, because it consumes more money and also takes more time. But, building a temporary wall doesn’t ask you to spend that much money and time.
How to build a temporary wall partition?
Do you want to know how to build a temporary wall partition in your home? I like so, then refer this piece of writing to get some ideas about that. However, before starting to construct temporary walls, you need to get permission from the homeowner if you’re living in the rental area.
Materials needed for building a temporary wall:
 Without beginning with the materials that required constructing a temporary wall leads you the improper and uncomfortable living area. Therefore, make sure that you have the following materials and tools.
- Wooden shims
- Drywall
- Screws
- Circular saw
- Hammer
- Sill seal
- Drill
Already we are familiar with the above-mentioned materials and tools except for sill seal. What is sill seal? Sill seal is a kind of thick foam insulation which is used at the base of exterior walls.
Steps to build a temporary wall:
 After preparing all those materials and tools, just follow the given steps to build a temporary wall at any place of your home.
Step #1:
First of all, cut a pair of sill seals based on the length that you want to make a wall, but width and height should be in the ratio of 2*4. These pair of pieces act as the top and bottom of the wall.
Step #2:
After completion of the installing base of the exterior wall, place the bottom plate over sill seal. Then ask helpers to hold the top plate to fix it by attaching the bottom plate. If there is any extra size on the plate, then trim it using a circular saw.
Step #3:
Now it’s a time to use nails or screws to fasten the ends studs into the plates, which provides the added stability. If you’re establishing temporary walls for your children, then stability is very important for safety.
Step #4:
As well as install either nails or screws in the remaining part of the temporary walls based on the intervals of 16 or 24 inches.
Step #5:
After finishing the installation, you may make use of some paints to decorate them.
Just follow the above mentioned 5 steps to finish the walls however you want.


